
Table of Contents
Note: Games become available for N-testing as they advance through the publishing process. If you’d like to N-test your game or have suggestions for tests, contact your publishing manager.
N-testing Checklist
Games must follow a set of necessary steps before they are available for N-testing.
- The game can be displayed in a N-testing whatever his status (in testing, Pre-publishing or Publishing). The list of games by publishing state is available in Homa Lab, only for Homa publishing managers and team members.
- A publishing manager must be assigned to the game and actively working on it
- The game must be displayed in the Homa Belly SDK > Manifest list
If these conditions have been met, you can follow the steps below to proceed. If you need any support, you can write to our support team.
Step 1: Add the N-testing into your game's manifest
N-testing must be enabled from the App Manifest by simply clicking a checkbox
- In Homa Lab, go to the Homa Belly SDK page. This page is only accessible to Homa publishing managers and team members.
- Go to Manifests and find your app's manifest in the list
- Click on “Edit”
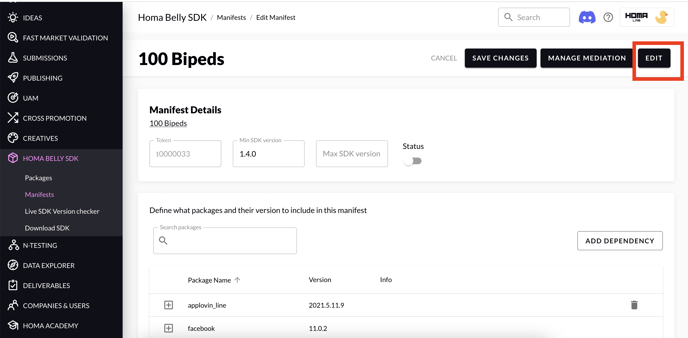
- Make sure that “Geryon (N-testing)” is checked and click on “save changes”
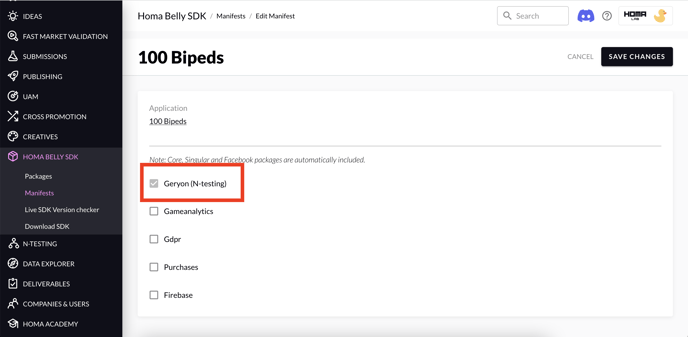
- After checking this button, you can come back to the N-testing page, your game should be available
Step 2: Create a list of parameters
Parameters are the changeable elements that will be integrated into your game and trigger specific actions when activated.
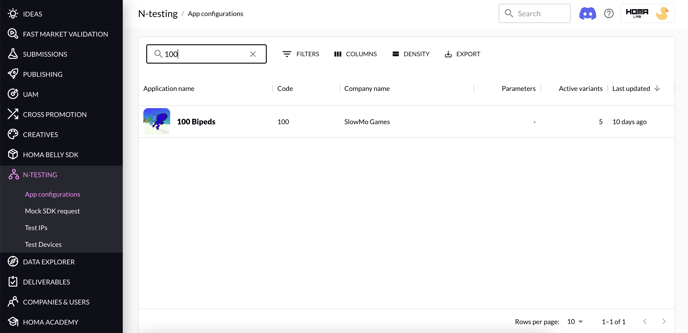
You can find parameters in Homa Lab under
- N-Testing → App Configurations
- Click on the game
- Parameters
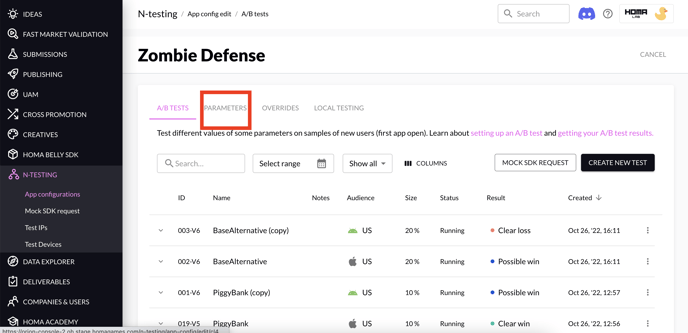
Parameters should always be added in the Default scope, which you can find on the left-hand side of the tab Parameters. To add parameters, click the Edit button, which you will able to add parameters with a CSV File or by adding them manually one by one.
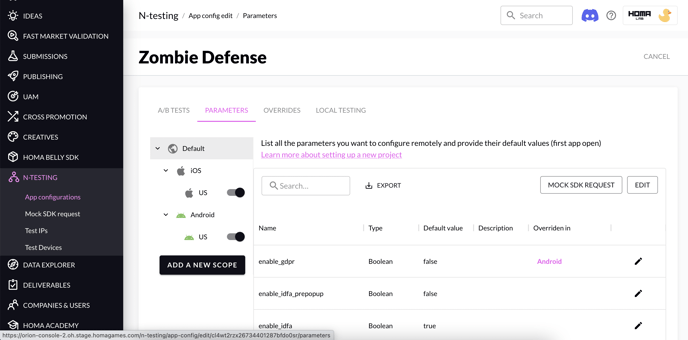
The parameters set in the Default scope are the default values your game will receive. These parameters will be overwritten with A/B test values for specific scopes. For instance, if you have a scope created for iOS US where the parameter has a different value (e.g. switches from true to false) and the user is on iOS, in US, and selected for the test, then the parameter will be overwritten for that user as false.
How to modify parameters?
The two ways in which you can modify parameters are described below.
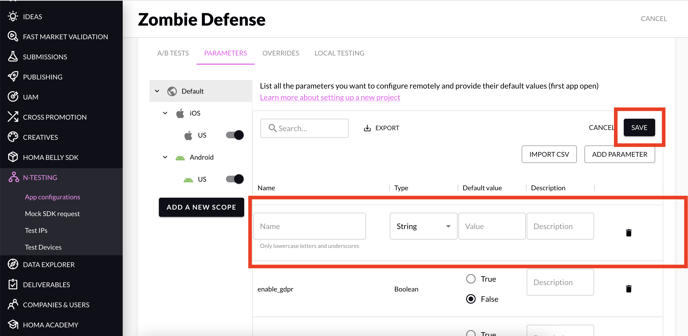
Option 1: Add parameters manually
You can manually add parameters, in case you don’t want to use a CSV import. To do that
- Go to N-testing
- Click on your game
- Click on Edit
- Add parameters
A new field will be displayed
| Data | Description | Guideline |
| Parameters name | Name of the parameters, Homa Publisher Manager / Live Ops should have the list of these |
Parameters' name should be in lowercase Parameters' name should not start ONLY with one letter like "a_parameter" |
| Type |
Type of the parameter, it can have the following values - String |
|
| Default value | Value that you want to set for this parameter | |
| Description | Description of the parameters, what is the target of this parameter? | Not mandatory but strongly encouraged |
Option 2: Create / update parameters via a CSV File
To quickly create a usable CSV for this purpose, you can download this template file and replace by the values directly:
To update the parameters of a current game, you can download the CSV file (N-testing → your game → Parameters tab —> Download CSV button). Once you have made the modifications, you can re-upload the CSV File.
Here are the columns and parameters you need in the CSV:
- parameter_name: The name that will be used to identify the parameter. It should be written in lowercase and you can separate words with an underscore (for example enable_gdpr). The list of parameters is defined by the developers and the publisher manager. To have the functional description of each parameter you can see the description column (if it’s filled) or ask the publisher manager directly.
- variable type: The type of variable used in code. Currently, it supports 4 types: Integer, Boolean, Float and String.
- description: Explanation of the parameters. It can help everyone who has access to this page to understand what is the behaviour of the parameter. Descriptions are optional.
- default_value: The default value of the parameter is used when the player is not included in any A/B tests, or when the test parameters can’t be sent to the player, for instance, when a user is playing offline.
Uploading a CSV to create/update the parameters
To update your new CSV file (N-testing → your game → click on the tab Parameters and click on “Edit”) select the CSV file, and you will see the new parameters added to the list.
⚠️ Keep in mind:
-
- Parameters should be in lowercase, you will receive a warning message if it’s not the case.
- List of parameters and default values are defined by the publishing manager.
- The values in the imported CSV will replace the existing values with the same name.
Setting correct parameter values
Having parameters set and configured correctly is essential for N-testing to function as intended. Therefore, if you are part of the game team but do not have access to the game code or parameters set, you may need support from a developer who does. Alternatively, you can contact the Homa publishing manager working on the game to verify the file or data via their own channels.
-
- For example, if a variable for player_speed already exists in the code and you want to add it to N-testing, you might need the developer to provide you with the variable type or the default_value currently already used in the code rather than setting different ones.
- If many variables are already created in the code and you do not have access to the code directly, we recommend asking the game developer implementing the parameters, to fill in the file with the correct values.
- Once the Table is fully completed, the developer will use it to implement the parameters in the code of the game.
Step 3: Creating a scope and applying values to it
A scope captures the characteristics of the audience you want to include in your test. It is currently defined by an OS and a region/country. Scopes can be used to create tests that apply only to a particular audience rather than to all players - such as only iOS users in the US.
For instance, you could use scopes to make country-level changes such as:
- For iOS in the US set the parameter enemy_speed at 3.
- For iOS in France set the parameter enemy_speed at 4.
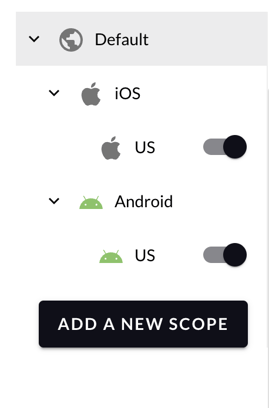
By default, there are 2 scopes available: iOS (worldwide) and Android (worldwide).
When testing LTV in particular we always recommend testing for one country and platform at a time as, for instance, LTV on Android in India may be very different from LTV on Android in the US.
Creating a scope

Note: After scope creation, if you don’t see the new scope immediately, a quick refresh will help.
Applying new value into a scope
Simply go to the scope, click Edit, update your parameter values (change values, add new parameters to override or upload a CSV) as needed, and click Save.
Next page: How to setup/launch an A/B test